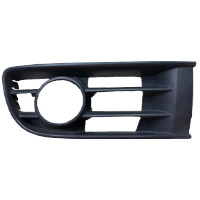
VW CADDY Bumper rear and front
Bumper VW CADDY models at best prices
Bumper VW CADDY: useful information
-
Parts recommended for simultaneous replacement as part of a service kit
- Bonnet
- Impact Absorber, bumper
- Wing fender
- Bumper reinforcement
- Front Cowling
- Spotlight Set
- Bumper grill
- Radiator Grille
- Headlight Trim
- Headlight
- Frame, headlight
- Wheel arch liner
- Daytime Running Light
- Fog Light
- Engine radiator
- Air conditioning condenser
- Minimum price £ 44,00
- Maximum price £ 258,00
-
Best pricesBuycarparts.co.uk offers Bumper parts of high quality for VW CADDY at very attractive prices
-
Save on shippingFree shipping within the UK applies to orders over £ 140 and excludes bulky items, tyres, or core parts.
-
Wide choiceWe currently have over 500,000 car parts in our product range.
-
Fast delivery
Shipping methods
-
Catalogue of manufacturers: Bumpers VW CADDY:
What kind of bumpers are there for VW Caddy?
These components might be made from different materials:
- Thermoplastic (ABS, PA, PC, PP, PE). When heated, their shape can be changed, so they can be easily repaired.
- Thermosetting (polyurethane or fibreglass). The parts made from it are unrepairable.
By intended purpose:
- Factory-installed or aftermarket parts.
- For customization. They improve the exterior and aerodynamics of the vehicle.
By location:
- Front.
- Rear.
Depending on the generation, version, and trim level of the vehicle, these components might have holes for parking sensors and headlight washers, and can also be fitted with a radiator grille.
What bumper brands is it better to opt for?
Diederichs, Blic, Van Wezel, and Prasco parts proved to be the most reliable ones and of the highest quality.
In what cases can the body part be repaired?
A scratch can be eliminated with the help of a polishing agent or a scratch remover pen. Deep cracks and holes are glued or soldered. However, if the component is severely damaged, it’ll be cheaper to get a new one.
How to remove and install bumpers on VW Caddy?
Before you start, read the car service manual. The process might vary depending on the design of a particular car.
To dismantle the part, you’ll need a Phillips screwdriver, a 10 mm combination spanner, and a Torx socket set.
Here is a rough sequence of steps one should follow to remove the front element:
- Undo the self-tapping screws on the side of wheel arch liners and radiator grille.
- Release the clips and pull the bottom part of the grille towards yourself.
- Remove the component.
- Use Torx Т27 to remove the fastener from the upper edge of the air intake opening.
- With the help of Torx Т25, undo the screws at the top of the main radiator grille.
- Detach the turn signal repeater by bending the plastic clip towards the wing.
- Undo the nuts on the sides with a 10 mm combination spanner.
- Loosen the bolts with Torx Т27.
- Remove the component.
The rear part should be removed together with the reinforcement. The steps may be as follows:
- Unscrew the self-tapping screws from the wheel arches with Torx Т25.
- Remove the hexagonal nuts and bolts from the reinforcement.
- Remove the component together with it, then detach the parts from each other.
The parts are mounted in reverse order.


